
The Vendor Record is where the Vendor specific information resides in the system. Enter in all necessary details as they pertain to each Vendor. Vendors can also be organized into Vendor Groups for filtering purpose on the Check Run screen.
Important Note
Once a Vendor Group has been created, it cannot be edited or deleted. Therefore, ensure that Vendor names and groupings are accurate before creating a Customer Group.
Add a New Vendor

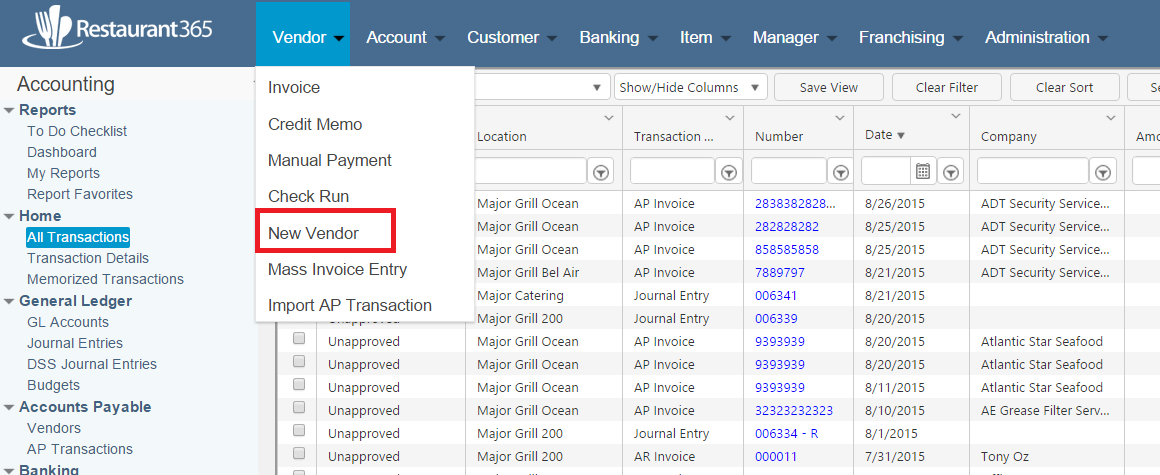
To add a new Vendor, hover over the 'Vendor' tab in the top ribbon and click 'New Vendor'. A Vendor record will open in a new window.
View Existing Vendors

To view an existing Vendor record, click 'Vendors' under 'Purchases' in the 'Operations' module. This will open a listing of Vendors to choose from.
General Tab
The General tab is where the Vendor information and other Vendor settings can be managed.

1) Name - The Vendor Name is the only required field on a Vendor Record. Enter the Vendor Name as it will be displayed in Restaurant365
2) Number - Vendor Number is an open text field that can be populated with the Vendor Number, or any other value that could be used for sorting purposes
3) Primary Contact - Select, or Create a Primary Contact for this Vendor on this drop-down
4) Comment - The Vendor Comment box is an open text field and can be used for any purpose. The values in this comment box will appear and be sortable on the Vendor List view in Restaurant365
5) Contact Information - Enter the Contact Information for the Vendor in these fields. The Address information will be displayed on Printed Checks for mailing purposes
- Note: Ensure that the zip code does not include a four digit extension
6) Inactive checkbox - In the event that your organization drops a Vendor after recording transactions with that Vendor, you will not be able to Delete the Vendor Record. You can flag the Vendor as Inactive by checking this checkbox and the Vendor will no longer appear in any 'Select Vendor' drop-downs in the system
Vendor Additional Info Tab

1) Entry Instructions - The detailed Entry Instructions for the Vendor that will appear during AP Invoice Entry (when saved on the Vendor record), as shown below:

2) Items Available on Invoice - For Vendors that have Vendor Items in Restaurant365, the Items available to select when entering Invoices for the Vendor can be determined using this field. The options include the following:
- All Items - All Purchased Items, as well as Vendor Items specific to the Vendor would populate the Item list on the AP/AR invoice screen. This is the default setting for all Vendors

- Vendor Items Only - Only Vendor Items for the Vendor would populate the Item list on the AP/AR invoice screen. This would limit the selectable items to only the Vendor Items of the selected Vendor

3) PO File Format - The file format that Purchase Orders will be exported in for this Vendor. Options include:
- CSV
4) Fintech Integration Credit Processing - If a Customer of Fintech, this selection enables the User to select how R365 will process refunds from Fintech. There are two options to choose from:
- Credit - Create a Credit Memo - This will create a Credit Memo to document this refund. This is the default option
- Refund - Create a Bank Entry - This will insert a line item called 'Fintech Refund' on the negative invoice and will have Undeposited Funds or a bank account assigned to it to a record the refund. Once mapped, the GL Account can be updated
- Note: This 'Fintech Refund' line item will need to be mapped in R365. Click here to learn more about processing Fintech Refunds and mapping New Vendor Items in R365
Open Transactions Tab
Any Open Transactions associated with the Vendor will appear in this list view.

All Transactions Tab
All transactions associated with this Vendor will appear in this list.

Contacts Tab
Any Contacts associated with the Vendor will appear in this list.

Locations Tab
By default Vendors are accessible to All Locations, but Vendors can be limited to specific Locations as well. This means that if a Vendor is limited to specific locations, then that Vendor will only be available for transactions of the specified Vendor Locations (where the selected transaction header Location is set as one of the Vendor's Locations). Vendor Location Numbers can also be added for each Location as needed. These Location Numbers are used for EDI Vendor Integrations.

- On the Vendor form, click the Location tab (screenshot above).
- By default the 'Available/Same All Locations' checkbox will be checked and the Location table will be hidden (meaning that this Vendor can be accessed by all Locations).
- To assign specific locations, uncheck 'Available/Same All Locations' and the Location selector and grid will appear.
- Choose a Location you want this Vendor to be accessible to in the 'Select Location' lookup field and click 'Add' to add that Location to the Locations table.
- Add the Location Specific 'Email' (used for Purchase Orders) and 'Vendor Location Number' (used for EDI Vendor Integrations) as needed.
- Continue these steps until all desired Locations have been added.
- Note: Ensure that all Vendors (even Vendors that will not be used in Purchase Orders or EDI Vendor Integrations) that will use this Vendor for AP Invoices / AP Credit Memos are added to this table, otherwise they will not be able to use or select this vendor during invoice entry
- Save the Vendor record.
1099 Tab
The '1099' tab is where all 1099 information is configured for the Vendor.

1) Name - This is the common name that the Vendor is referred to within your Organization. This will be auto-populated based on the name written in the 'General' tab and will be displayed as read-only
2) Check Name - This is the name used to print on a check. This will be auto-populated based on the name written in the 'General' tab and will be displayed as read-only
3) Exclude when processing 1099s - When checked, this will not include the Vendor during 1099 processing
4) Company - If the 1099 Vendor Type is a company, select this option. When selected, the following fields will appear:
- 1099 Company Name - The name that matches the Tax ID - EIN
- Tax ID - EIN - This Tax ID for the Vendor, which may be the EIN (Employer Identification Number). The formatting for this field is: ##-#######
5) Individual - If the 1099 Vendor Type is an individual, select this option. When selected the following fields will appear:
- 1099 Name - The name that matches the SSN/TIN
- Tax ID- SSN/TIN- The Tax ID for the individual, which is formatted as: ###-##-####
- Note: All but the last four digits will be masked for security purposes. Full Access and Users with the View Vendor Tax ID Secondary Security Role will be able to view SSNs unmasked
Transaction Entry Options
6) Active - These checkboxes mark the corresponding form as 'Active', or in use, for the Vendor
- Note: Marking a form as 'Inactive' will update all Unapproved transactions that use this form and box to the next defaulted form/box. If no other forms are active, the 1099 information will be removed from those transactions
7) Default - The default form for the Vendor, which will appear on the data entry screen (AP Transactions). Only one form can be marked as the default form, and if the default form is marked as 'Inactive', then the first active form will be set as the default
- Note: The default form can be updated at any time
8) Form - The available 1099 forms for the Vendor, which include:
- 1099-MISC - Miscellaneous Income
- 1099-NEC - Nonemployee Compensation
- 1099-INT - Interest Income
9) Box - A default box selection will need to be made for the form(s) selected. Options include:
- 1099-MISC- Miscellaneous Income
- 1 - Rents
- 2 - Royalties
- 3 - Other Income
- 4 - Federal Tax Withheld
- 5 - Fishing Boat Proceeds
- 6 - Medical Payments
- 7 - Direct Sales
- 8 - Substitute Payments
- 9 - Crop Insurance Proceeds
- 10 - Proceeds to an Attorney
- 12 - Section 409A Deferrals
- 13 - Excess Golden Parachute
- 14 - Non qualified Deferral Comp
- 15 - State Tax Withheld
- Pre-2020 Box 7: Nonemployee Compensation
- Pre-2020 Box 9: Direct Sales
- Pre-2020 Box 10: Crop Insurance Proceeds
- Pre-2020 Box 14: Gross Proceeds to Attorney
- 1099-NEC- Nonemployee Compensation
- 1 - Nonemployee Compensation
- 4 - Federal Tax Withheld
- 5 - State Tax Withheld
- 1099-INT- Interest Income
- 1 - Interest Income
- 2 - Early Withdrawal Penalty
- 3 - Interest on US Bonds
- 4 - Federal Tax Withheld
- 5 - Investment Expenses
- 6 - Foreign Tax Paid
- 8 - Tax-Exempt Interest
- 9 - Activity Bond Interest
- 10 - Market Discount
- 11 - Bond Premium
- 12 - Bond Premium Treasury
- 13 - Bond Premium Tax Exempt
10) Allow Box Override - When checked, this allows the User to select a box other than the one selected on the Vendor record when entering transactions
For more information on 1099, view the 1099 Setup and Maintenance training article.

Multiple columns can be added to the Vendors list in regards to 1099 information. To add a column, simply click the 'Show/Hide Columns' selector and check the box next to the desired columns. Click here to learn more about working with lists.
GL Accounts Tab
The 'GL Accounts' tab will only appear for Users with either the Accounting Manager or Accounting Clerk Primary Security Role. This tab allows Accounting Admin Users to map GL Accounts in R365 to the GL Account numbers provided by the Vendor. Only Vendors who utilize DataPass need to have their GL Accounts mapped. Mapping these accounts will then automatically set up AP Invoices brought in through FTP as 'Entry by Account' in R365.
- Note: If no mappings are found for a GL Account, an error will occur. Users will then need to set up the necessary mappings so that data can be imported.

To map GL Accounts, Users with the necessary security access should navigate to this tab, select the desired GL Account in R365, and then enter in the Vendor's GL Account number for that selected GL Account. Click 'Add' to include the account mapping for this Vendor. After adding all necessary mappings, ensure to save the Vendor record.
Attachments
Some Vendors may have contracts or buying agreements. These and any other Vendor specific documents you wish to keep readily accessible can be added to the Vendor Record in Restaurant365. Do this by clicking on the ‘Upload File’ button found on each tab. Click here for more information on Uploading Files.