AP Credit Memos can be entered in Restaurant365 to record any credits that are due. Credit Memos can then be applied to Open AP Invoices.

To record an AP Credit Memo, hover over the ‘Vendor’ menu in the top ribbon and select ‘ Credit Memo’.
AP Credit Memo Header

1) Location - The Location that will appear on the header of the CM. This will default to the User's default Location, but can be changed if needed. Once changed, the 'Location' field in the Details grid below will also update the selected Location. Click here to change a default Location
- Note: Locations will be grayed out if they are inactivated. Click here to learn how to inactivate a Location
2) Vendor - The name of the Vendor from which the CM was received. Once selected, the Vendor address will be noted below 'AP Credit Memo' in the top ribbon and any necessary 1099 information from the Vendor record will be listed next to the GL Date. This provides necessary information at a quick glance
- Note: Depending on the Vendor Entry method (set on the Vendor record), the details grid will be set to 'Account' or 'Item'. When entering the details by Item, you'll be able to credit back to the exact inventory item if your Vendor has the Entry method set to 'By Item'
3) Credit Number - The Credit Memo number. If no CM Number is available, create one
4) Document Date - The date listed on the CM
5) GL Date - The date the CM posts to the General Ledger. Based on your R365 Operations Plan, this can simply be entered the same as the Document Date and will not impact your entry
- Note: When this date is different than the Document Date, an orange exclamation point
 will appear, bringing attention to the fact that there is a difference between the two dates
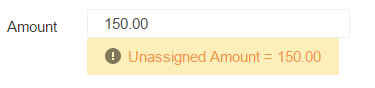
6) Amount - The CM Total Amount. Upon entry, an 'Unassigned Amount' warning will appear. This warning will remain until the Amount is equal to the total details amount in the Details grid
7) Comment - An optional field that is useful for adding additional notes about the CM
8) GL Account Selector - Enter the details of the CM starting with the First GL Account
9) Amount - The line item detail amount
10) Comment - The line item detail comment (optional)
11) Location Selector - The line item detail Location (will default to the Location in the header, but can be changed)
12) Start Date of Service - The date that the range of service begins. This is optional and could be used to record the specific date for a refund / credit of service. This will be explained further in the section below
13) End Date of Service - The date that the range of service ends. This is optional and could be used to record the specific date for a refund / credit of service. This will be explained further in the section below
14) Add / Delete Button - This will either add or clear the information from the line. If added, the line will appear in the grid
When finished, save this Credit Memo for approval.